Lower development costs: schedule Cloud SQL instances to start and stop

Jonathan Simon
Developer Programs Engineer, Google Cloud
When you're using a Cloud SQL instance as a development server you likely don't need to have it running constantly. If so, you can greatly reduce the cost of using Cloud SQL by scheduling your development server to start every morning when your work day starts and stop it each evening when you're done with your development work. Configuring your instances to run this way can save you up to 75% of the cost to run an instance per week versus having it continuously running.
This blog post will walk you through the steps to configure your Cloud SQL instance to start and stop each workday using Cloud Functions, Cloud Pub/Sub, and Cloud Scheduler.
I'll be demonstrating this process using a SQL Server instance but the overall approach will also work for MySQL or PostgreSQL instances running in Cloud SQL.
Create a Google Cloud Platform project
To get started, we’ll need a Google Cloud Platform project. If you already have a project, you can skip this step. Follow the documentation for creating and managing projects to create a new project.
Create a SQL Server instance
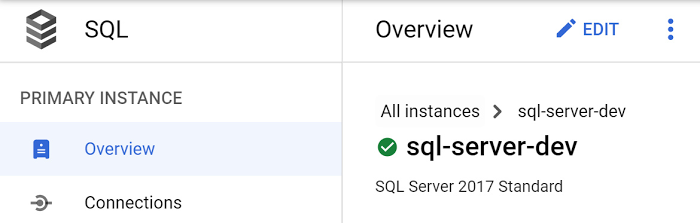
Once your project is created click the Cloud Console’s left-menu and select “SQL” to open the Cloud SQL section. We can now create our instance.
Click the “CREATE INSTANCE” button and select the “Choose SQL Server” option.
Enter a valid Instance ID
Example: sql-server-dev
Enter a password for the “sqlserver” user or click the “Generate” button.
For "Database version" select “SQL Server 2017 Standard”.
Select a "Region" where the instance should be located like "us-west1".
For the Region's zone, since the instance is for development and we're optimizing for the lowest cost, select "Single zone".
Under "Customize your instance" click "Show configuration options" to configure a low cost development instance.
Click and expand the "Machine type" section and select a "Lightweight" machine type which has 1 vCPU and 3.75 GB of RAM.
Click and expand the "Storage" section and select the minimum option of "20 GB".
Click and expand the “Backups” section and select “12:00 PM to 4:00 PM” as the window for automatic backups. Backup operations can only be done while the instance is running so this selection needs to be within the timeframe of 9:00 AM to 5:00 PM when our instance will be running.
With all of that information provided the create instance form should look something like this:
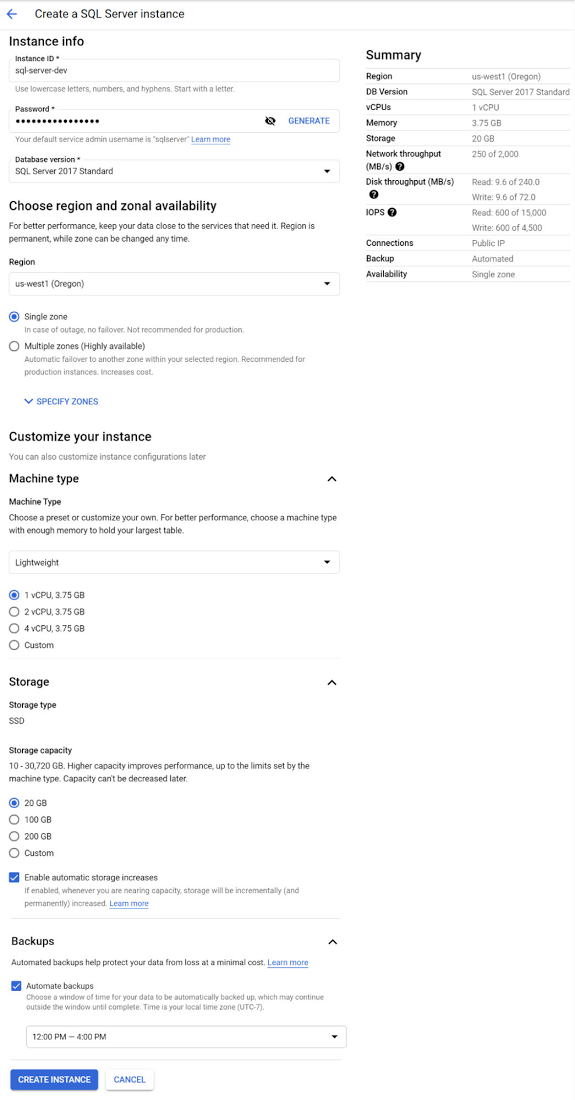
Click “CREATE INSTANCE” to complete the process of creating the instance.
Create a Cloud Function to Start or Stop a Cloud SQL instance
With your Cloud SQL instance created, the next step is to create a Cloud Function that will start or stop the instance. Go to the Cloud Functions section of the Cloud Console and click the "CREATE FUNCTION" button.
Enter the following information:
Specify a Function name:
Example: start-or-stop-cloud-sql-instance
Select a Region where the Function will run:
Example: us-west2
For Trigger type select “Cloud Pub/Sub”. We’ll create a new Pub/Sub Topic named “InstanceMgmt” to be used for Cloud SQL instance management. Within the “Select a Cloud Pub/Sub Topic” drop-down menu, click the “CREATE A TOPIC” button. In the “Create a Topic” dialog window that appears, enter “InstanceMgmt” as the “Topic ID” and click the “CREATE TOPIC” button. Then click the “SAVE” button to set “Cloud Pub/Sub” as the “Trigger” for the Cloud Function.
With all those values entered, the completed “Configuration” section of the “Create function” form should look something like the following:

Click the “NEXT” button at the bottom of the “Create function” form to move on to the next step where we enter the code that will power the function.
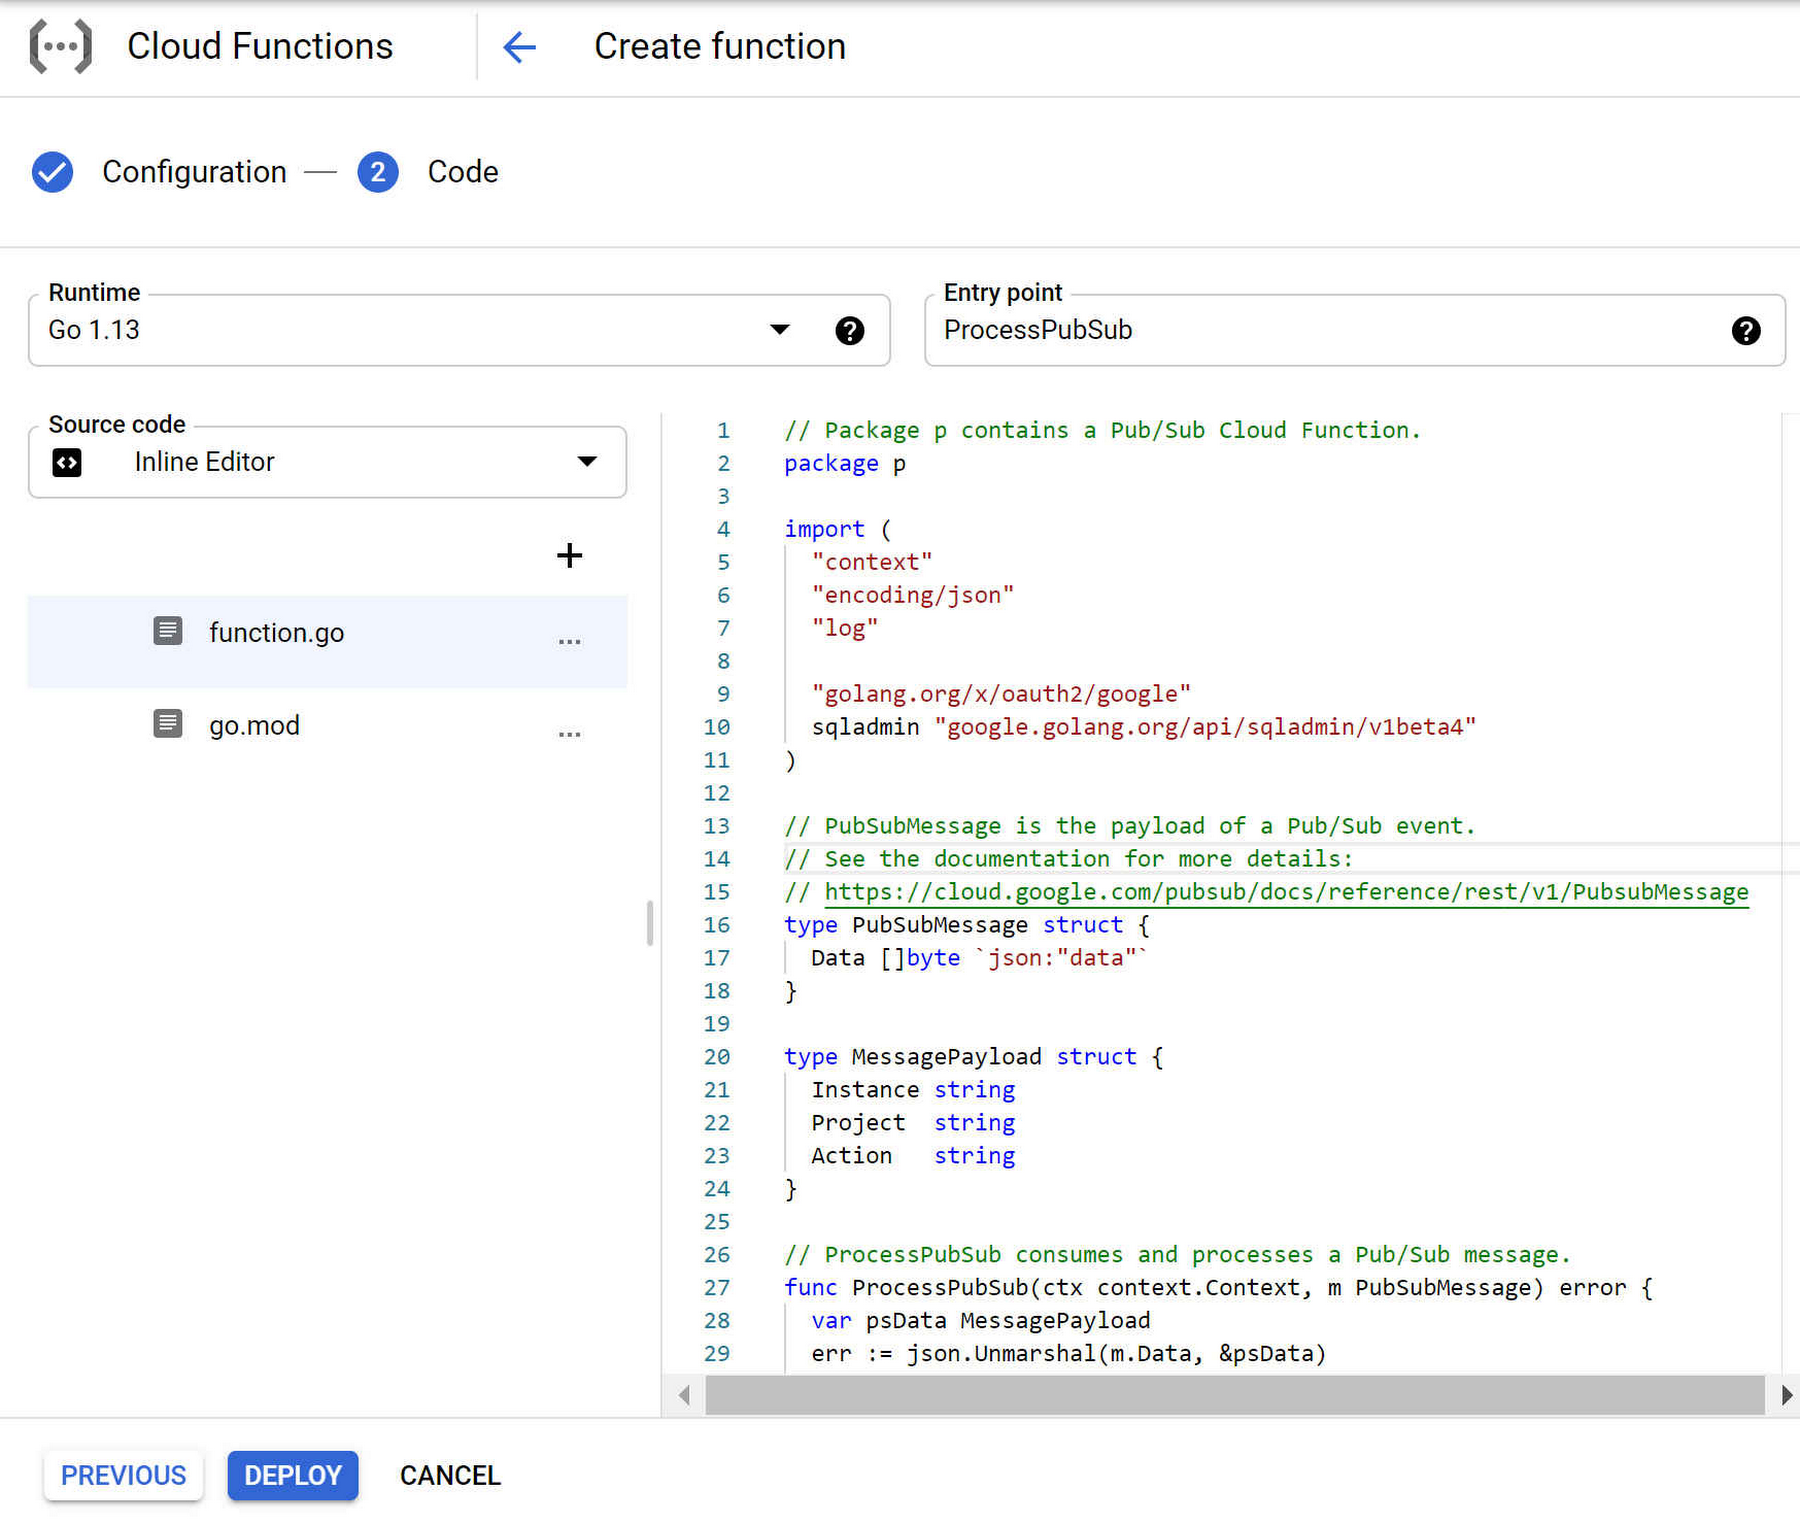
Now in the “Code” step of the “Create function” form, select “Go 1.13” as the “Runtime” and enter “ProcessPubSub” as the code “Entry point”.
Then copy and paste the following code into the code section of the “Source code — Inline Editor”:
The completed “Code” section of the “Create function” form should look something like this:
Click the “DEPLOY” button to deploy the Function. It will take a minute or two for the deployment process to complete.
Grant Permission for the Cloud Function to Start or Stop Cloud SQL instances
Next we need to grant our Cloud Function's Service account permission to run Cloud SQL Admin methods like "Patch"; used to start or stop instances.
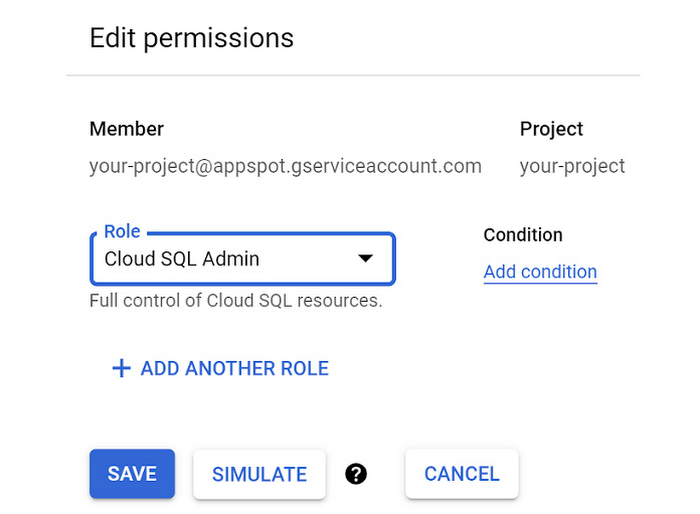
Go to the IAM section of the Cloud Console and find the service account used by Cloud Functions named “App Engine default service account”. It has the suffix: “@appspot.gserviceaccount.com”. Click its pencil icon to edit it.

In the “Edit permissions” dialog window, click the “ADD ANOTHER ROLE” button. Select the “Cloud SQL Admin” role to be added and click the “SAVE” button.
Verify that the Cloud Function works as expected
Excellent! We're now ready to test out our Cloud Function. We can do so by posting a message to our Pub/Sub topic which is set as the trigger for our function.
First we'll test out stopping the instance. Go to the Pub/Sub section of the Cloud Console and select the "InstanceMgmt" Topic. Click the "PUBLISH MESSAGE" button and paste in the following JSON message, replacing <your-project-id> with your actual Project ID.
The Pub/Sub message to be published should look something like this:
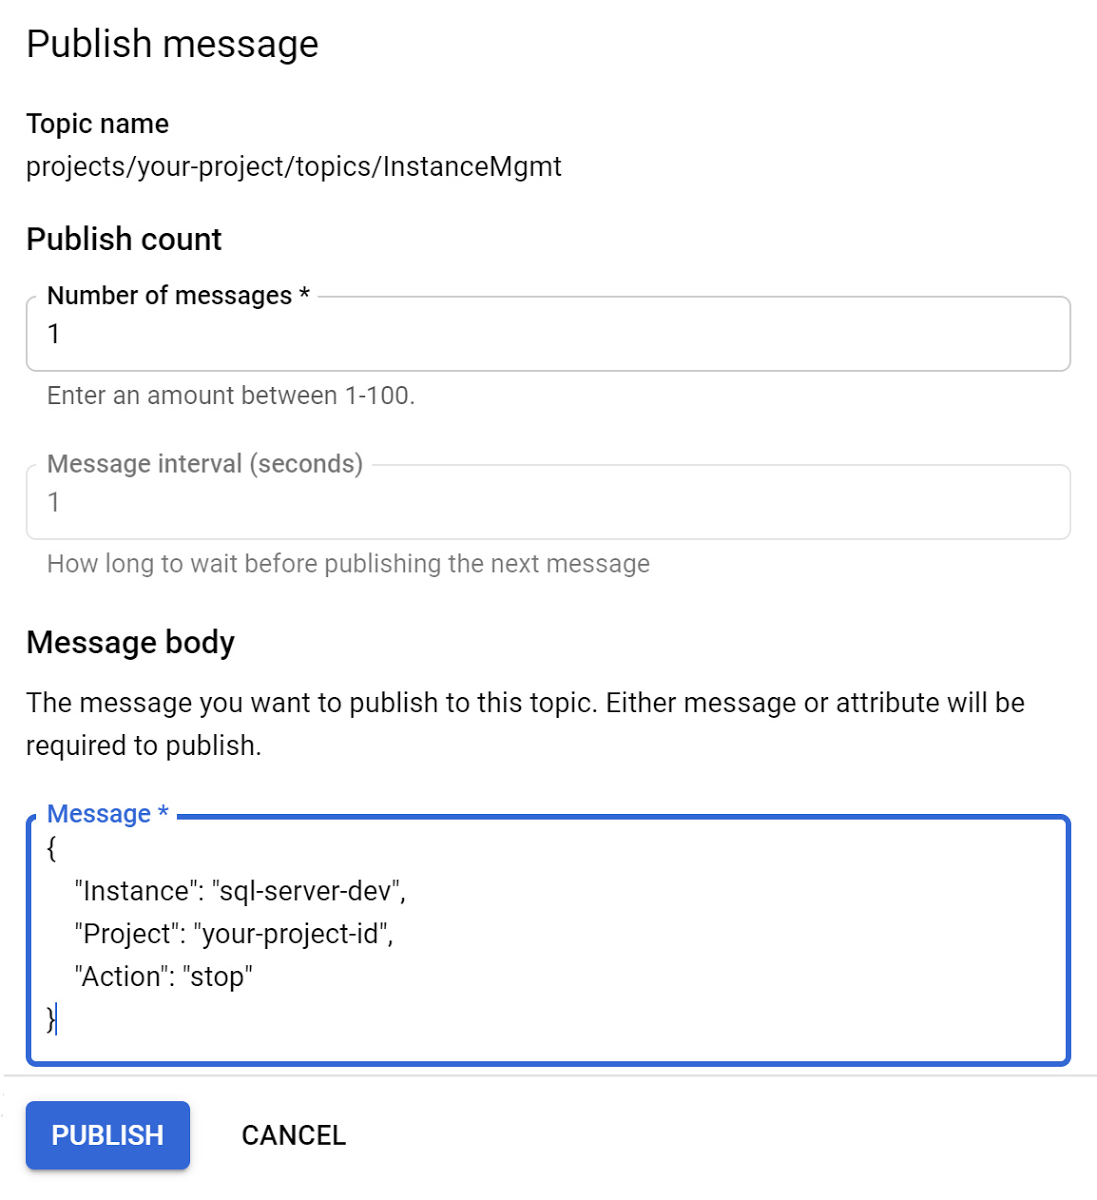
Drum roll... click the "PUBLISH" button to publish the message which will trigger our Cloud Function and stop the instance. Going back to your Cloud SQL instance details you should see that your instance is now stopped:

Now let's publish another Pub/Sub message to start the instance. Go to the Pub/Sub section of the Cloud Console and select the "InstanceMgmt" Topic. Click the "PUBLISH MESSAGE" button and paste in the following JSON message (this time with "start" as the Action). Be sure and replace <your-project-id> with your actual Project ID.
Click the "PUBLISH" button to publish the message which will trigger our Cloud Function and restart the instance.
Back on the Cloud SQL instance details page you should see that your instance has been restarted after 2-3 minutes:
Create Cloud Scheduler Jobs to trigger the Cloud Function
Great! Now that we've confirmed that the Cloud Function is working correctly, the final step is to create a couple of Cloud Scheduler jobs that will start and stop the instance automatically.
Go to the Cloud Scheduler section of the Cloud Console and click the “SCHEDULE A JOB” button.
Enter a “Name” for the scheduled job:
Example: start-cloud-sql-dev-instance
Enter a “Description” for the scheduled job:
Example: Trigger Cloud Function to start Cloud SQL development instance
For the “Frequency” of when the job should be run, enter “0 9 * * 1-5” which schedules the job to be run at 9:00 am every day Monday-Friday.
Select your timezone from the Timezone selector.
Under the “Configure the Job’s Target” section, select the “Target type” to be “Pub/Sub” and for the “Topic” specify “InstanceMgmt”.
For the “Message body” enter the same "start" JSON message you used when you tested the Cloud Function earlier in this post. Don't forget to replace <your-project-id> with your actual Project ID.
The completed “Create a job” form should look something like this:
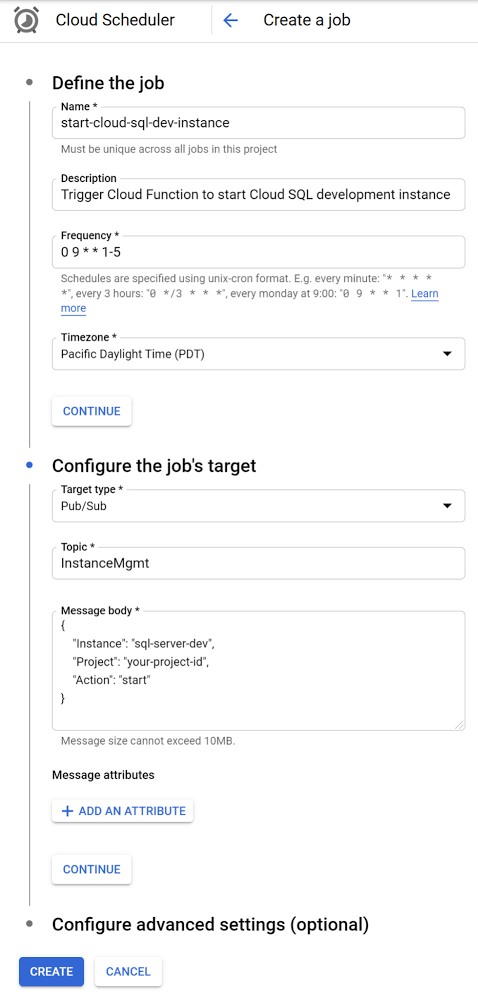
With all that information supplied, click the “CREATE” button to create the "start" Cloud Scheduler job.
Now we've got a scheduled job that will start our Cloud SQL instance every weekday at 9:00 am. The only thing left to do is to create one more scheduled job to stop the instance every weekday evening. Click the Cloud Scheduler “SCHEDULE A JOB” button again to create it.
Enter a “Name” for the scheduled job:
Example: stop-cloud-sql-dev-instance
Enter a “Description” for the scheduled job:
Example: Trigger Cloud Function to stop Cloud SQL development instance
For the “Frequency” of when the job should be run, enter “0 17 * * 1-5” which schedules the job to be run at 5:00 pm every day Monday-Friday. See the Cloud Scheduler documentation for more information on setting frequency.
Select your timezone from the Timezone selector.
Under the “Configure the Job’s Target” section, select the “Target type” to be “Pub/Sub” and for the “Topic” specify “InstanceMgmt”.
For the “Message body” enter the same "stop" JSON message you used when you tested the Cloud Function earlier in this post. Don't forget to replace <your-project-id> with your actual Project ID.
With all that information supplied, click the “CREATE” button to create the "stop" Cloud Scheduler job. After the job creation completes you’ll see the job list with the "start" and "stop" jobs you've just created.
Now it's time to take a second and appreciate the smart steps you've just performed to ensure that your development database will only be running when you need it ... then bask in the glory of having set up an extremely cost efficient Cloud SQL instance for the development of your next project. Great job!
Next steps
Use the Cloud Console to see the current state of your Cloud SQL instance and to create more instances.