When you begin learning about Cosmos DB and NoSQL databases, the first questions you should ask are what is a NoSQL database and what is the problem that No SQL databases address? Just to clarify, NoSQL does not necessarily mean that you are not going to use SQL on Cosmos DB. In fact, you will use some SQL commands to query NoSQL databases. NoSQL databases are the type of databases which stores and retrieves data in a different way as compared to traditional relational databases. When there is a need to store large amounts of data, the traditional relational databases must be scaled-out. NoSQL provides features such as horizontal partitioning that aids scaling out. When dealing with a huge amount of data, you need latency and high throughput. NoSQL provides solutions to all these problems. NoSQL databases support the concept of replication which ensures the data is accessible and available to the consumer as the replicas are kept in different parts of world making it quick to access.
What is Azure Cosmos DB?
According to Microsoft’s Azure Documentation, Cosmos DB is “Microsoft’s globally distributed, multi-model database.” It offers geo-replication of the data and virtually unlimited scale storage. It provides multiple APIs that support efficient access to the multiple data models such as tables, graph and columnar.
Azure Cosmos DB Key features:
- Turnkey global distribution- Replication of data across different Azure regions which ensures availability and low-latency.
- High scalability- Horizontal partitioning makes Cosmos DB more scalable and durable for big amounts of data.
- Multi-model and Multi-API database – Cosmos DB is based on the atom-record-sequence data model which supports multiple data model such as documents, tables, graphs, key-value pairs, etc.
Here are APIs with supported SDKs available in various languages:
- Data can be modelled as document and there are 2 different APIs for doing this:
- SQL API: It mainly treats entities as JSON (JavaScript Object Notation) documents and these are hierarchical JavaScript Object Notation documents.
- MongoDB API: It mainly works with MongoDB’s binary version of JSON called as BSON. It is similar to JSON but it has more features and it extends the JSON model with additional data types and multi-language support.
- Table API: This API is basically an evolution to Azure Table Storage. In this data model, the entities are stored as a key-value pairs.
- Gremlin API: Where there is a need to annotate data with meaningful relationships, Gremlin API can be used. It promotes the data to be modeled using graphs and for accessing the data cross many relationships efficiently you will have to use graph traversal language.
- Cassandra API: This API is based on Columnar data storage feature. The data is physically stored in column-oriented fashion. You will have to provide schema upfront to be able to store the data.
The selection of API is entirely up to you; it depends on what type of data you want to store and in what fashion you want to store it. All these API look different structurally, but they all share the same capabilities of Cosmos DB. The main features of Cosmos DB such as partitioning, global distribution, durability and high scalability will remain the same across all APIs. In this article we will be mostly using SQL API.
Creating an Azure Cosmos DB Database on the Azure Portal
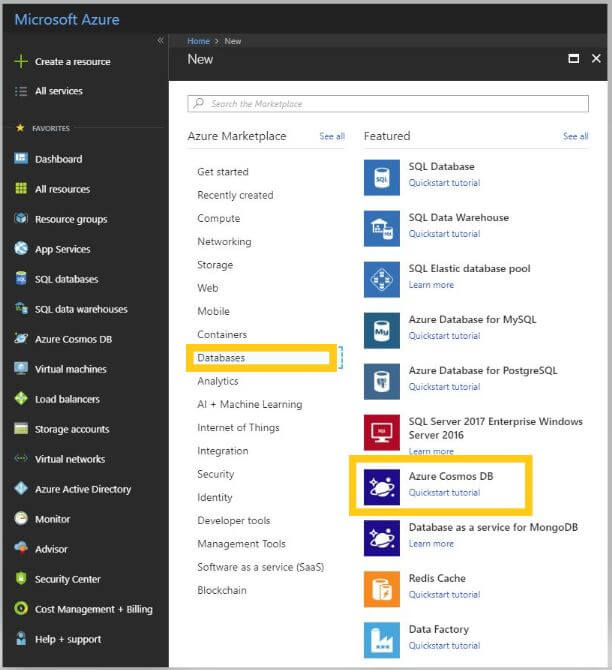
To begin developing and deploying Azure Cosmos DB applications, you need to create an account on Azure portal. Once you log in to your account, click on Create a resource, and then you will see Azure Cosmos DB under Databases.
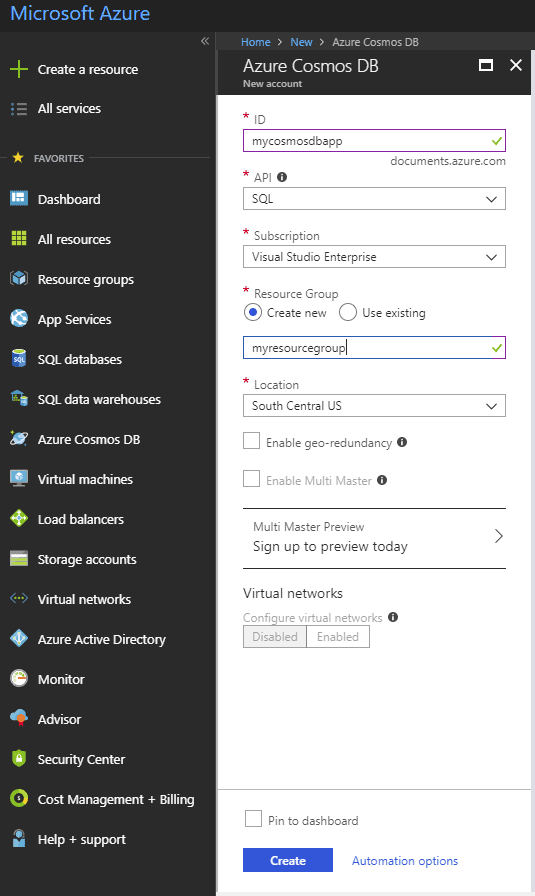
You will need to provide a globally unique name in the ID field below, which will be used as endpoint address for the Cosmos DB account. Select the API from the list of APIs which will govern the data model you want to use. To follow along with this article, select SQL. You can select the subscription from the list of subscriptions you have and choose a resource group if you have already created one. You can add global distribution to your data model if you want to replicate it over different regions.
Once you hit the create button, you will see that the database is being deployed. If you have checked Pin to dashboard in the previous page, you will begin to see your Cosmos DB in the Dashboard screen. Otherwise, you can see it if you navigate to the Azure Cosmos DB section. It can take few minutes to set things up for a new account.
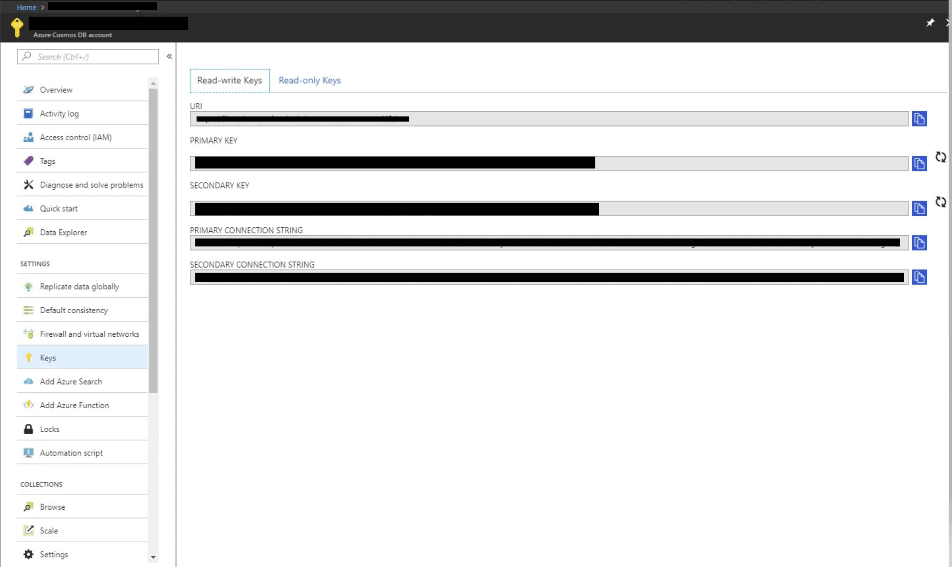
Once you see that new Azure Cosmos Db account is created and online, navigate to the Keys page under the database. Here you will see that Primary and Secondary keys are assigned to the account. These keys provide unlimited access to the account so they should not be shared with end users. If you feel that any of the keys are compromised you can switch between the keys and generate a new one. Here is how the keys page looks. Combining the keys with your endpoints gives you a Primary and Secondary Connection String. These connection strings can be used to access the database from your application.
Introduction to the Local Cosmos DB Emulator:
You just saw how easy it is to create a Cosmos DB account on the Azure Portal. If you are planning to write and test the application using the Cosmos DB database, you don’t need to create an Cosmos DB account at all. You can download a Cosmos DB emulator and run it locally. With the local emulator, you will be able to create an application without using an Internet connection. Off course, you won’t be able to use some of the features that the Azure account provides such as global distribution, but after you have created and tested your application you can just change the local connection string to the connection string from the Azure account. All in all, the local emulator is just like Azure Cosmos DB, but it gives you more flexibility by providing most of the key features locally on your machine.
Benefits of using local emulator:
- No need for an Azure subscription and Cosmos DB account
- Develop applications without any extra cost
- Deploy to the cloud account just by replacing the local connection string with the real connection string
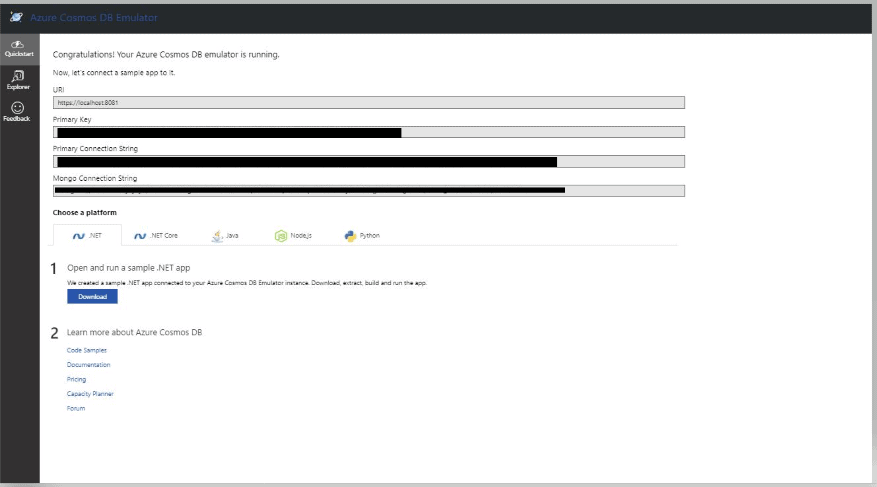
You can download the Local Cosmos Db emulator from this link. Once the emulator fires up, you can see it show up in your browser with an address similar to https://localhost:8081/_explorer/index.html. The emulator not only simulates the Cosmos DB service but also the Azure portal UI. Once started, you will see the connection strings as mentioned below:
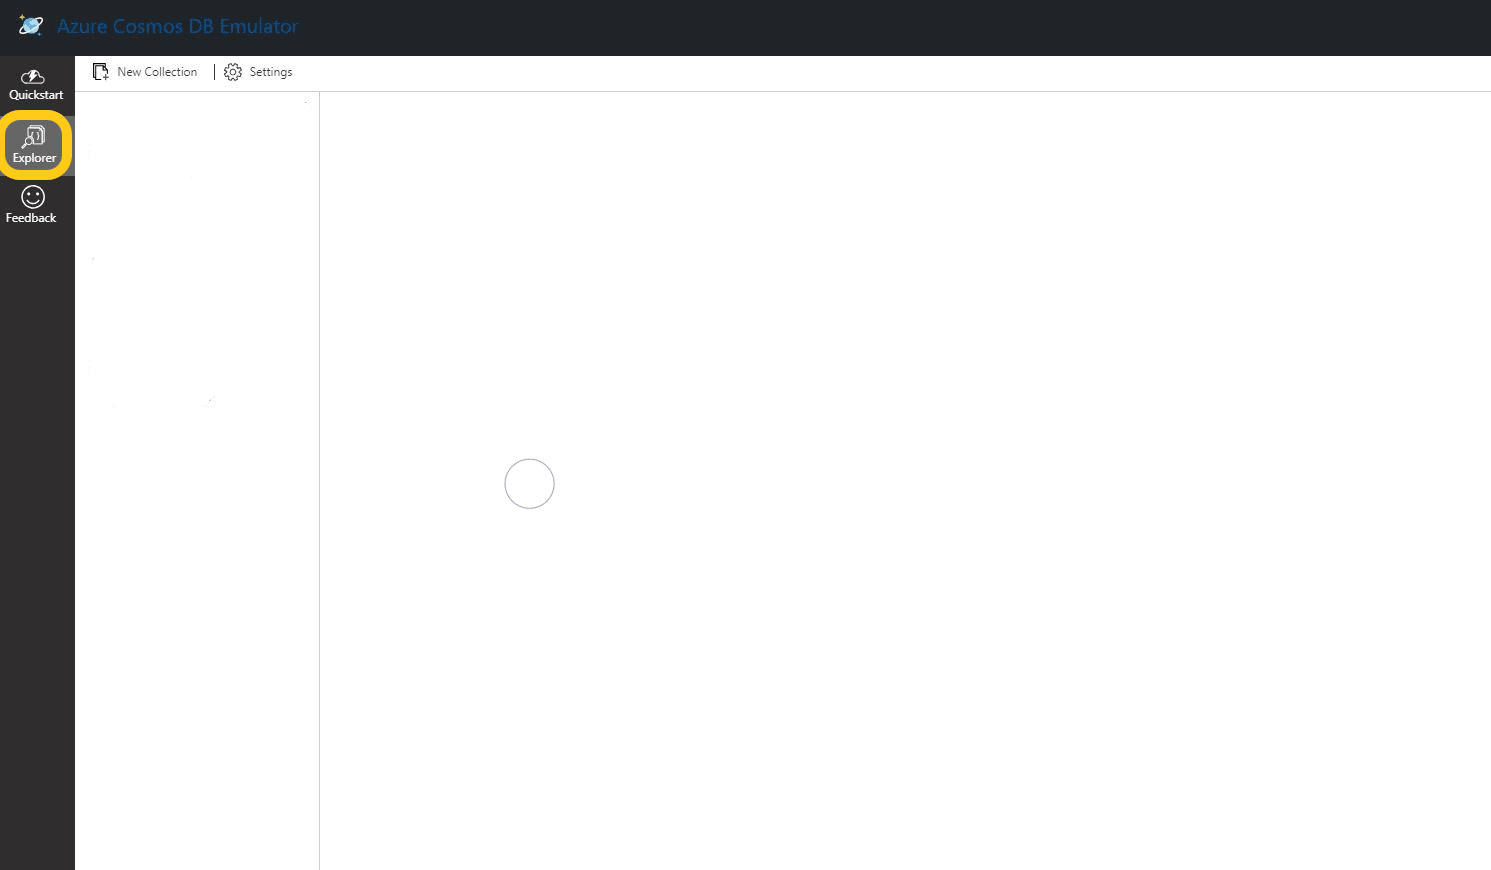
Click on the Explorer page. It’s similar to the Data Explorer page in the Azure Portal. If you are on the Explorer page for the first time, you will notice that there is no Collection to the Cosmos DB right now.
Local DB Emulator Data Explorer:
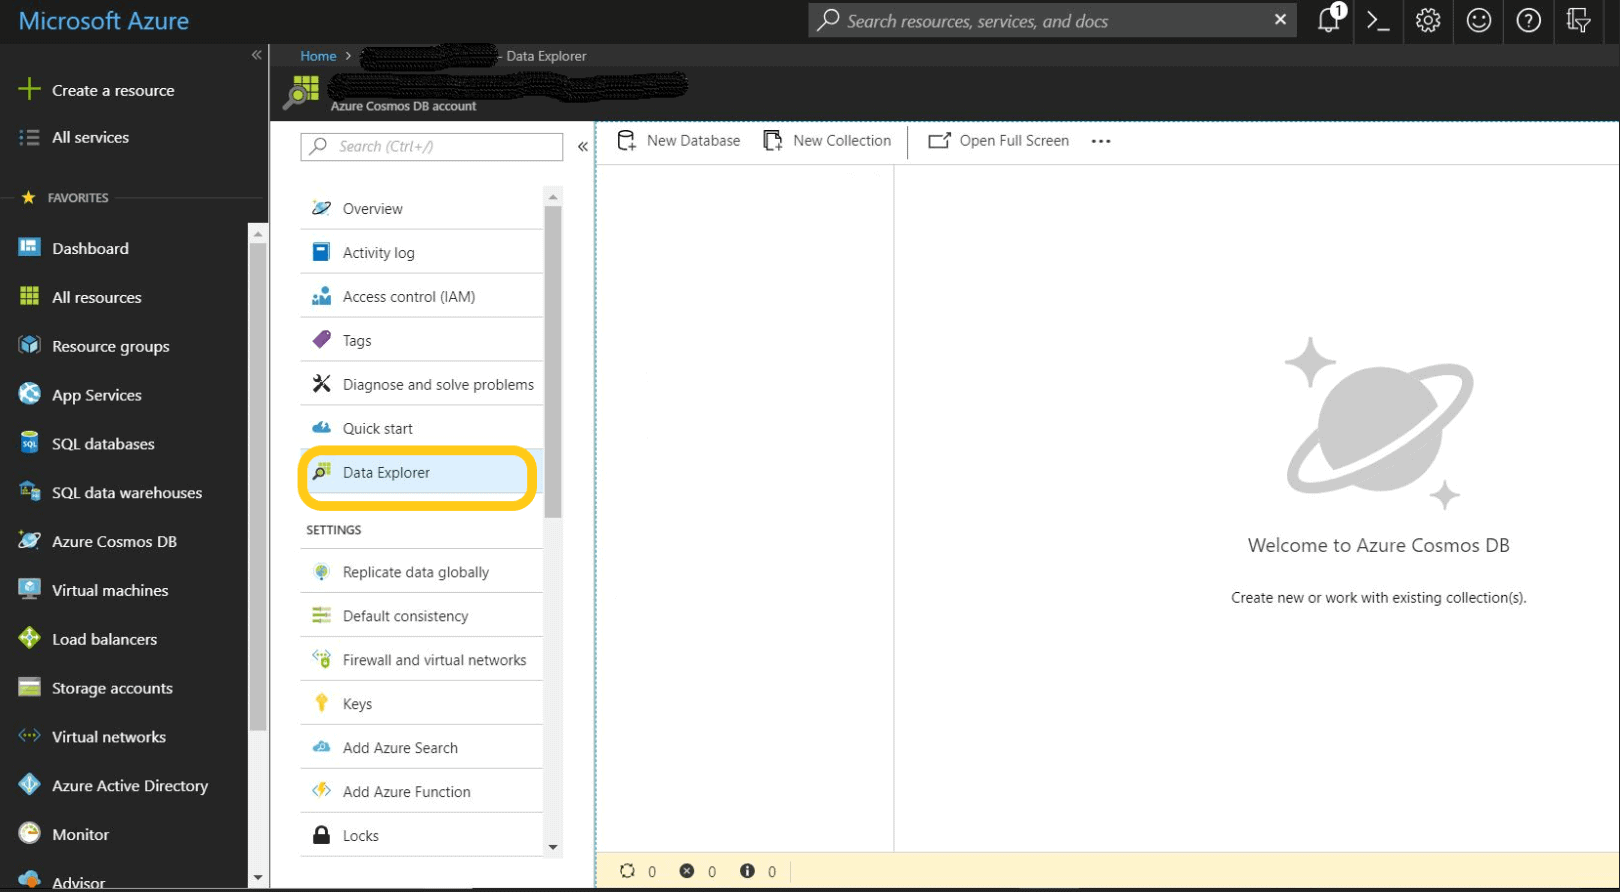
Azure Portal Data Explorer:
In a moment, you will add a new Collection, but before you do that let me briefly introduce you to the concept of collections and documents.
Each of the APIs has a different term for data containers, SQL API calls containers Collections, the table API uses the term Tables, and Gremlin uses Graphs. Be it a table, graph or collection, it means all the same to Cosmos DB.
A number of databases can be run on a single Cosmos DB server. Like the tables in an RDBMS, you have collections in the Cosmos DB. A collection may store multiple documents; hence documents are analogous to records in RDBMS. Insert, update, and delete operations can be performed on a collection.
The following table will help you relate RDBMS and Cosmos DB terminologies clearly:
|
RDBMS |
Cosmos DB |
|
Table |
Collection |
|
Column |
Key |
|
Value |
Value |
|
Records / Rows |
Document / Object |
Creating a Collection:
Now that the emulator is running, you can create a new collection. Click the New Collection option. You must specify the id of a new or existing database, and then you have to specify the name of the collection within that database. In many cases, you are going to have only one collection in a database. In such cases, the database and collection are really the same things. All the items in a container can be of different types and can have different schemas. So, essentially you are not going to create one collection for each type of entity in your data model. These are more like tables in RDBMS, where you are not going to create one collection per entity type.
If you are very sure that your data is going to grow quite large, or you are going to manage partitioning by yourself, you keep the Fixed storage capacity selected which is default option. If you choose Unlimited, then Cosmos DB automatically handles the server-side partitioning. This is fully simulated even by the local emulator. With unlimited, the collection becomes truly elastic. That means the capacity grows automatically as Cosmos DB adds the partitioning on its own. With fixed, it is exactly one physical partition, so it won’t grow automatically. If you need it to grow, you must manage partitioning by yourself. This is commonly referred to as client-side partitioning. In this case, you would be adding multiple fixed capacity partitions yourself as needed to manage growth of your data. It’s a best practice to use server-side partitioning as it will take care of everything for you.
Next comes Throughput, which is where you request and pay for the performance level that you want this collection to deliver. This is expressed in the form of request units or RU/s. There are no actual costs involved when you are using the emulator, but while using Cosmos DB on Azure portal lower, values deliver lower throughput at a lower cost, and higher values deliver higher performance at higher cost. For some data you may require high throughput, this the reason you may want to create multiple collections in the same database.
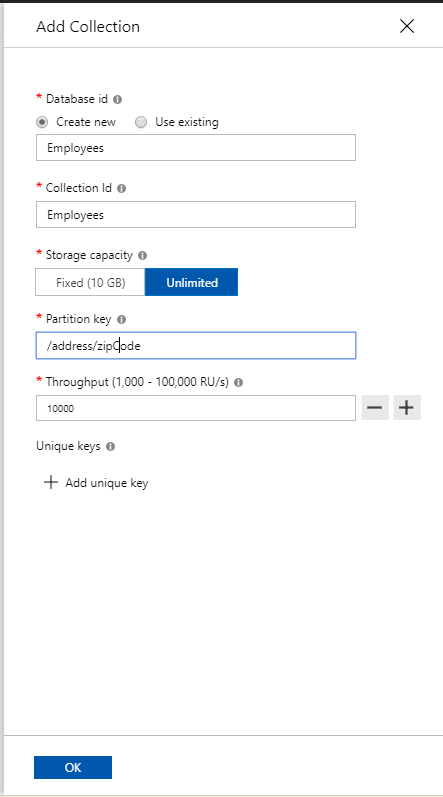
The last and most important piece is defining the partition key. It’s basically used to group multiple partitions together within physical partitions. You will notice that, the partition key is not mandatory if you have selected fixed storage. If you select the unlimited option for the storage capacity, you need to provide the partition key value in that case. For instance, when creating a collection of employees, you could use zip code as a partition key. It would mean that all the employees with same zip code will be physically stored within the same partition, and new partitions would get automatically added as new zip codes are added to the data.
Create a new collection as shown below. Both the database and collection have the same name Employees. The option, Unlimited, was chosen for storage so that Cosmos DB will automatically handle horizontal partitioning based on the partition key. 1000 RU/s for throughput is way more than needed, but since this example uses the local emulator, high values are fine. Finally, since Unlimited storage was selected, the Partition key must be provided. This example uses zip code as the partition key. The employee document will have a property called zipCode nested in the address property.
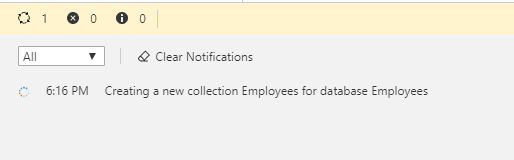
After you click OK, you will see following message that the local emulator is creating a collection for you.
Once the collection is created, you will see the Employee collection in the list of collections as shown below.
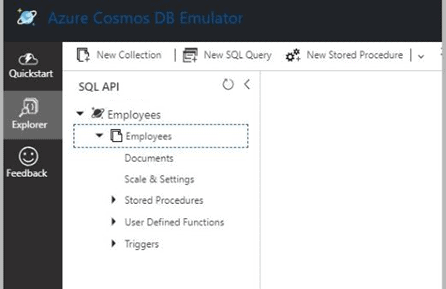
Creating documents:
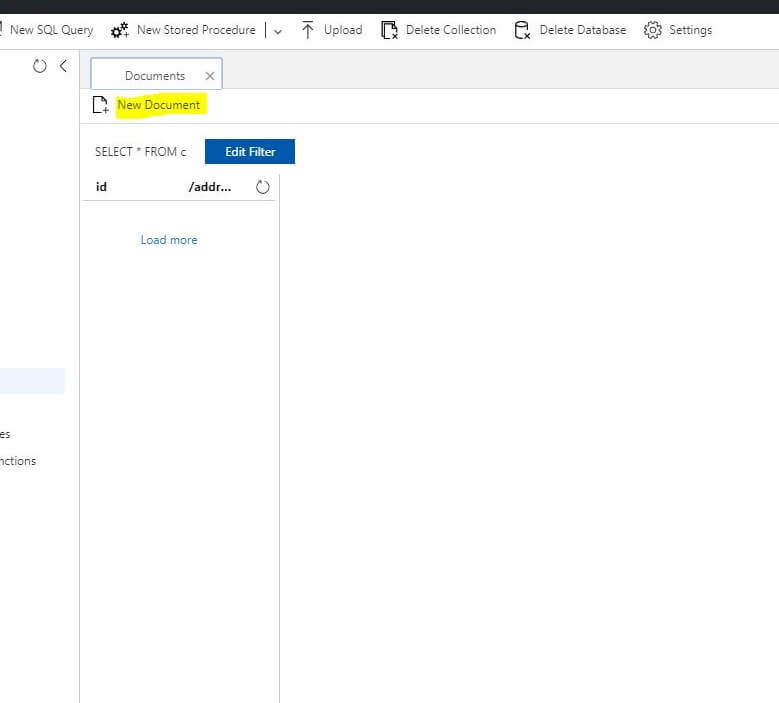
To add a document, select Documents and click New Document. Now it’s ready for you to type in the JSON for the first employee.
Every document has its own id property that must be unique amongst all documents within the partition. In this scenario every document is unique in the collection with the combination of id and partition key. You will find that your application does not need a meaningful id, you can query various other properties to find your documents. You can leave out the id property for now, as Cosmos DB will automatically create a unique identifier for you once you save your document.
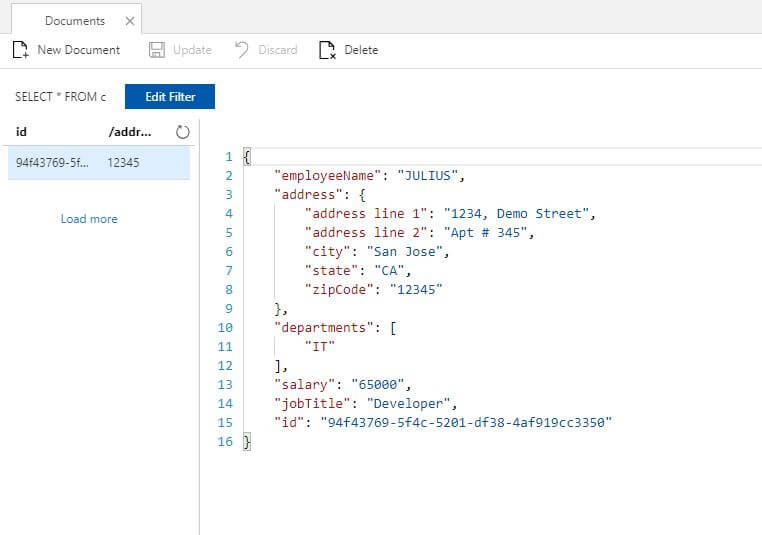
To edit the JSON for the first employee, several properties will be added. The property address is a complex type which has various nested properties. It also has the partition key property called zipCode. There is another property called departments which is an array of strings. All the other properties such as employeeName, salary and jobTitle are strings. Once you are ready, you can hit save and you will see the id generated by Cosmos DB. The newly generated id is a guid which is used to differentiate multiple documents within the partition.
Here is the code for the first Employee:
|
1 2 3 4 5 6 7 8 9 10 11 12 13 14 15 |
{ "employeeName": "JULIUS", "address": { "address line 1": "1234, Demo Street", "address line 2": "Apt # 345", "city": "San Jose", "state": "CA", "zipCode": "12345" }, "departments": [ "IT" ], "salary": "65000", "jobTitle": "Developer" } |
As Cosmos DB is schema-free, you can add a new property anytime later without any issues. Add another employee with a new property hireDate.
Here is the code for the second Employee:
|
1 2 3 4 5 6 7 8 9 10 11 12 13 14 15 16 |
{ "employeeName": "Rockey", "address": { "address line 1": "64645, KP Street", "address line 2": "Apt # 125", "city": "Dallas", "state": "TX", "zipCode": "75044" }, "departments": [ "IT" ], "salary": "89000", "jobTitle": "Senior Engineer", "hireDate": "2015-12-12" } |
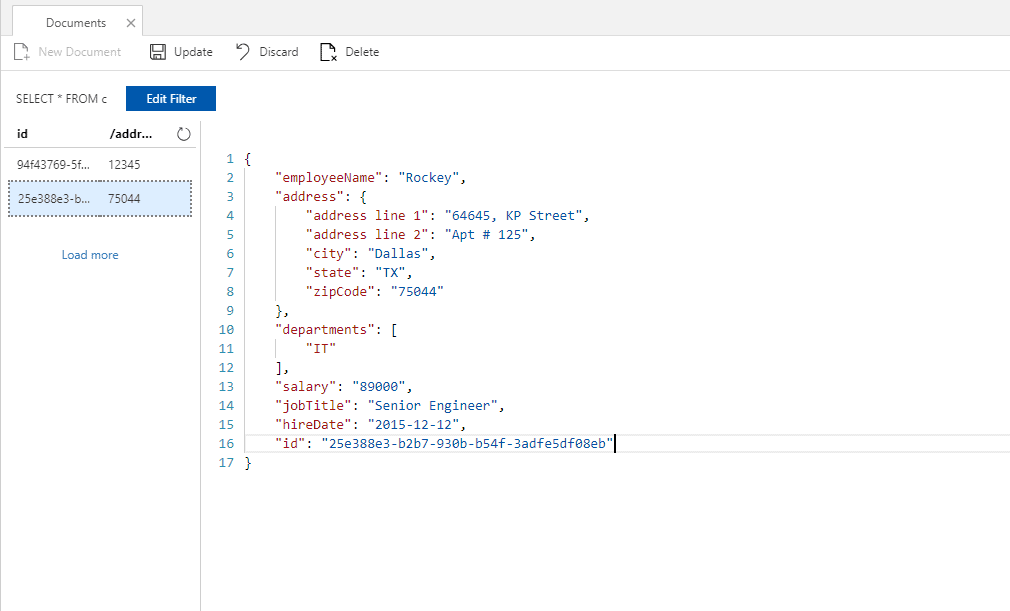
As you can see, the second employee is saved with a new guid value for the id with the additional property called hireDate. HireDate was not supplied for the first employee. In this demo you have created JSON by hand, but in ideal scenarios, your application code will create it for you. Even though you will not be creating these JSON documents through the portal, you can easily update the documents by hand using the GUI.
Running the queries:
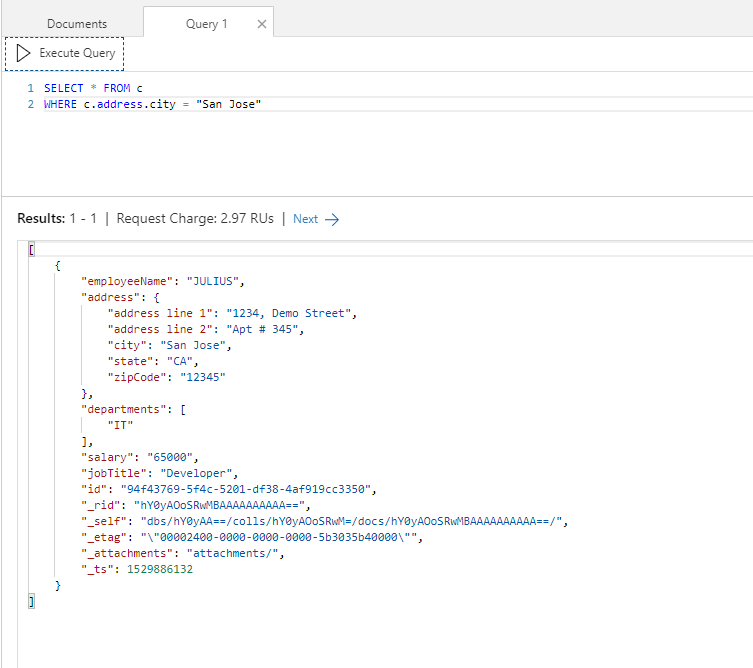
You can click New SQL Query and start querying the collection. To start, query the collection to return all the employees in the city of San Jose. As you can see, the query has returned employees who live in San Jose.
Query:
|
1 2 |
SELECT * FROM c WHERE c.address.city = "San Jose" |
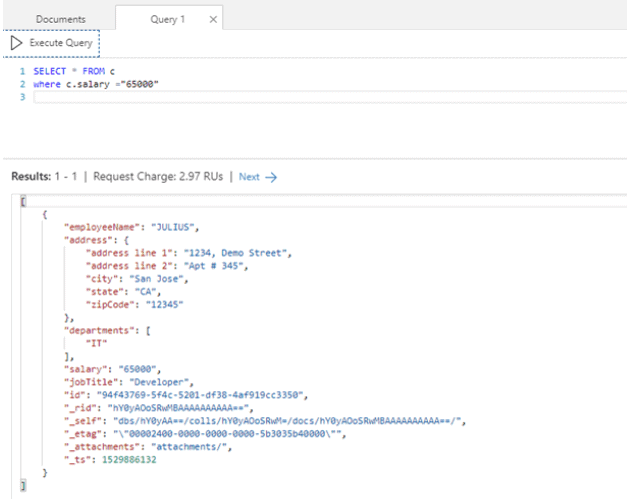
Run another query to look for employees whose salary is 65000.
Query:
|
1 2 |
SELECT * FROM c WHERE c.salary = "65000" |
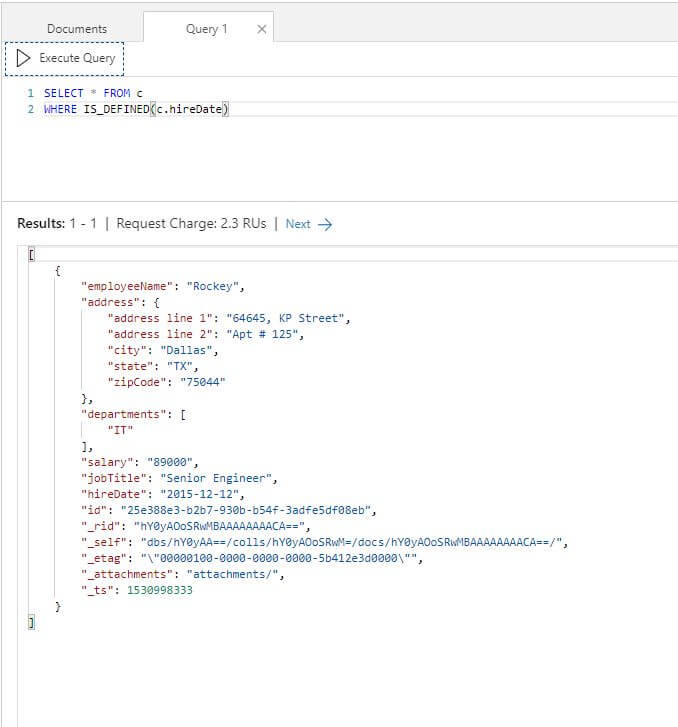
To identify all the employees who have hire date mentioned, you will need to use the IS_DEFINED function as shown below. As you can see, it just returns the second document which includes hireDate.
|
1 2 |
SELECT * FROM c WHERE IS_DEFINED(c.hireDate) |
As you can see, by using the local emulator you can simulate and run the queries without incurring any costs. This includes support for creating and querying the documents and scaling collections as needed. To make your applications globally scalable, you will have to update the connection string from the local emulator to an Azure Cosmos DB connection string. Essentially, you can develop your whole application using the local emulator and when you are ready, just deploy it to Azure with a small configuration change.
Conclusion
Azure Cosmos DB is one of the quickest solutions for building a globally distributed database in the Azure cloud. Cosmos DB is a feature rich database which supports various APIs, and it’s easy to query the database using SQL queries. With the use of the Local Emulator, users can reap most of the benefits of Azure Cloud locally, free of cost, and without actually subscribing to the Azure portal.
Reference
https://docs.microsoft.com/en-us/azure/cosmos-db/create-sql-api-dotnet
Load comments